How to Use Video Clipping in Remote Legal
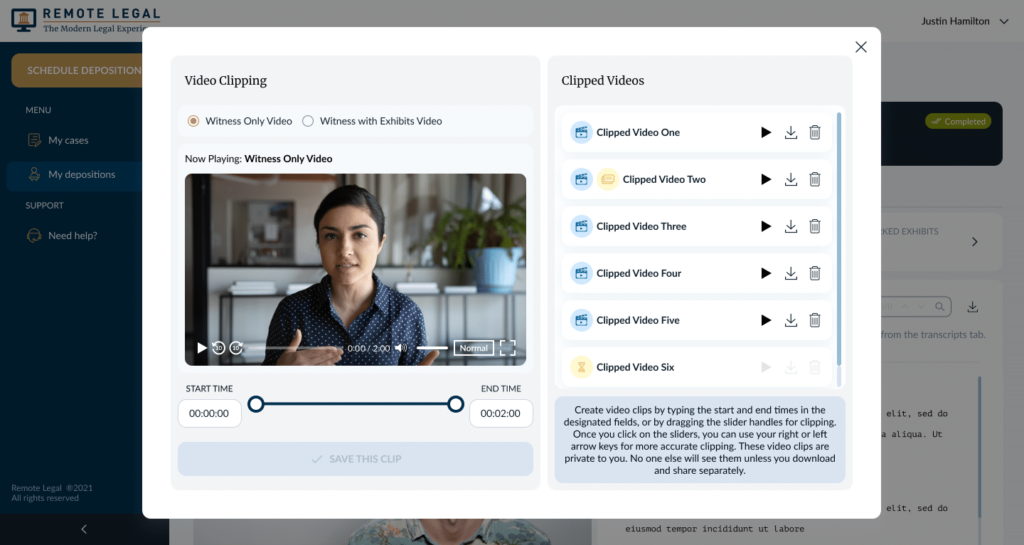
Video Clipping with Remote Legal allows you to easily capture, edit key highlights, and turn hours of recordings into compelling video moments – proven to win cases.
You can edit both Witness-Only Videos and Witness-Exhibit DualView Videos – depicting critical moments in a deposition as a witness reacts side by side with key evidence.
There is no need to hire a video editor, use complicated software, or require special equipment.
Video clipping is complimentary and available on all past, present, and upcoming videos captured with HD quality.
Please follow these simple steps below to start clipping your videos.
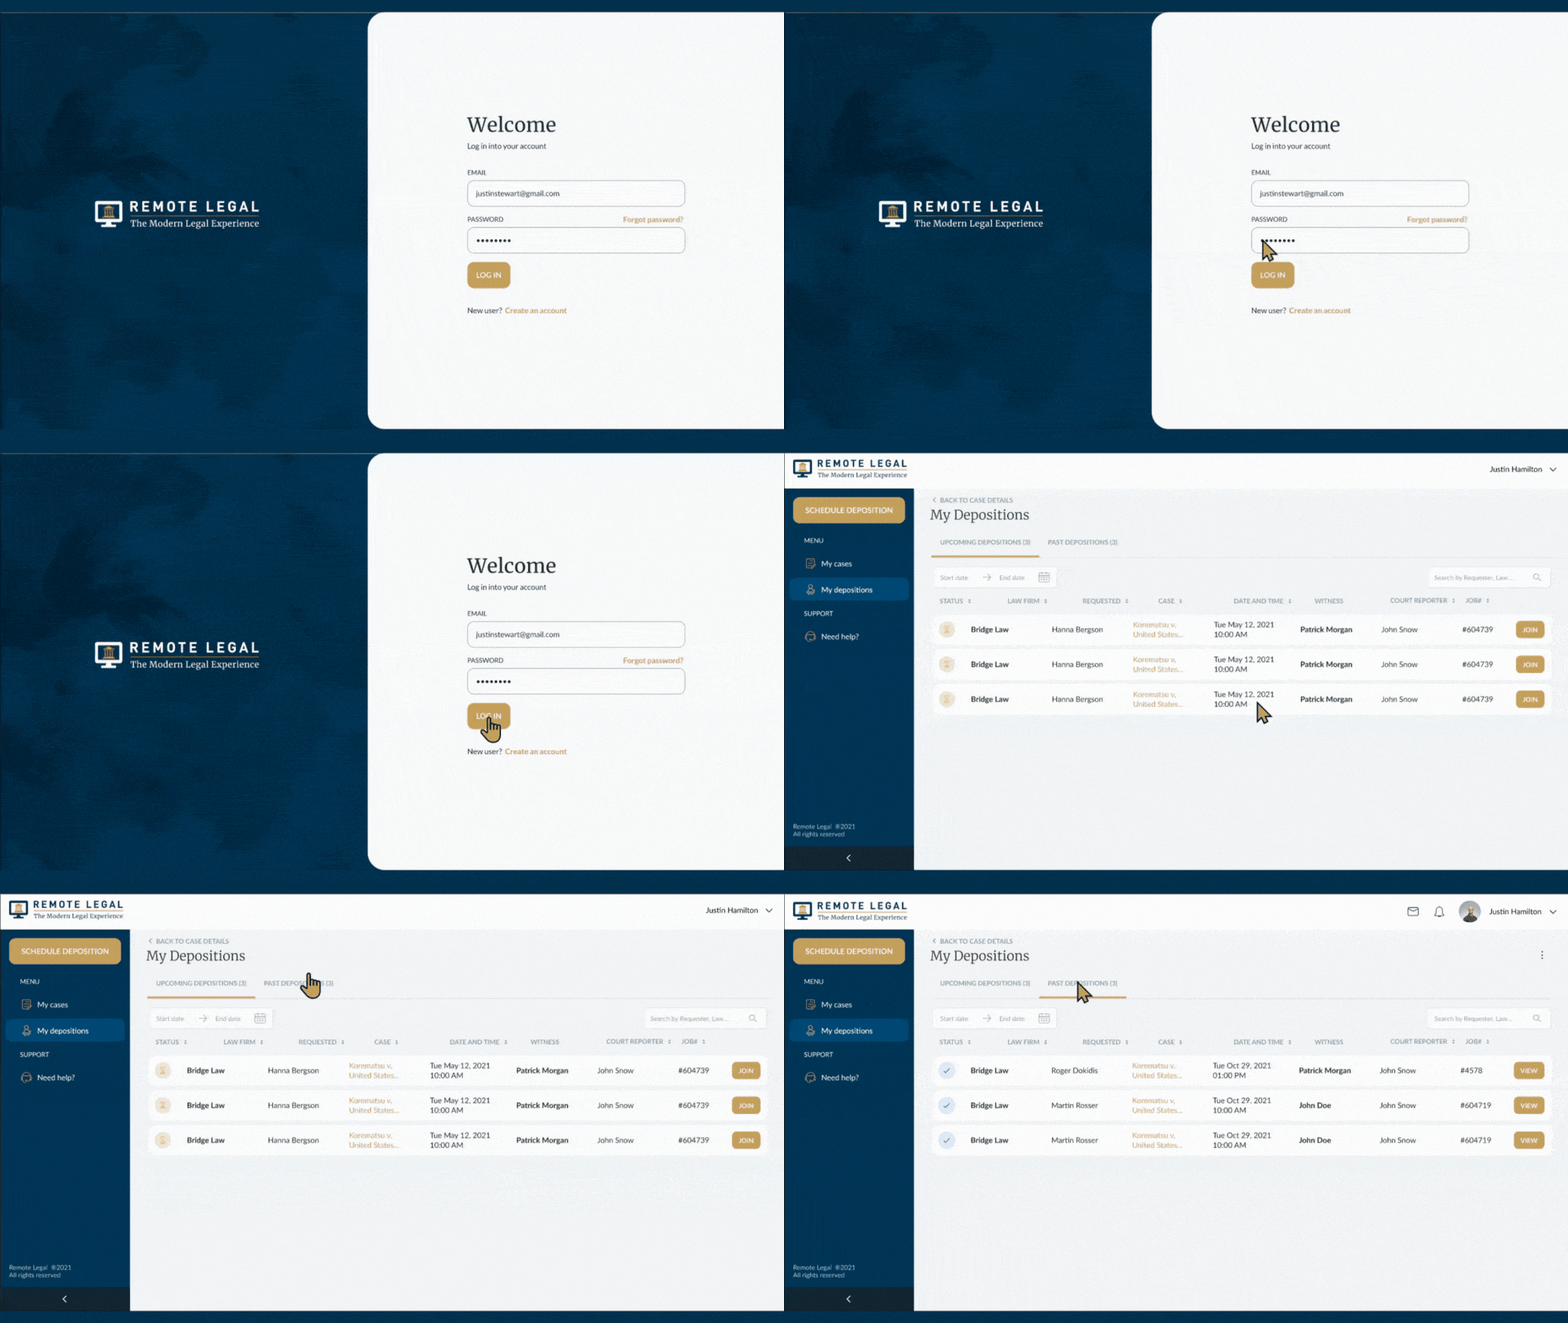
Step 1: Access Your Dashboard
Log in to your Remote Legal account [here] and navigate ‘My Depositions’ where you’ll find your list of upcoming and past recorded depositions. Click on ‘Past Depositions.’
Step 2: Select Your Deposition Video
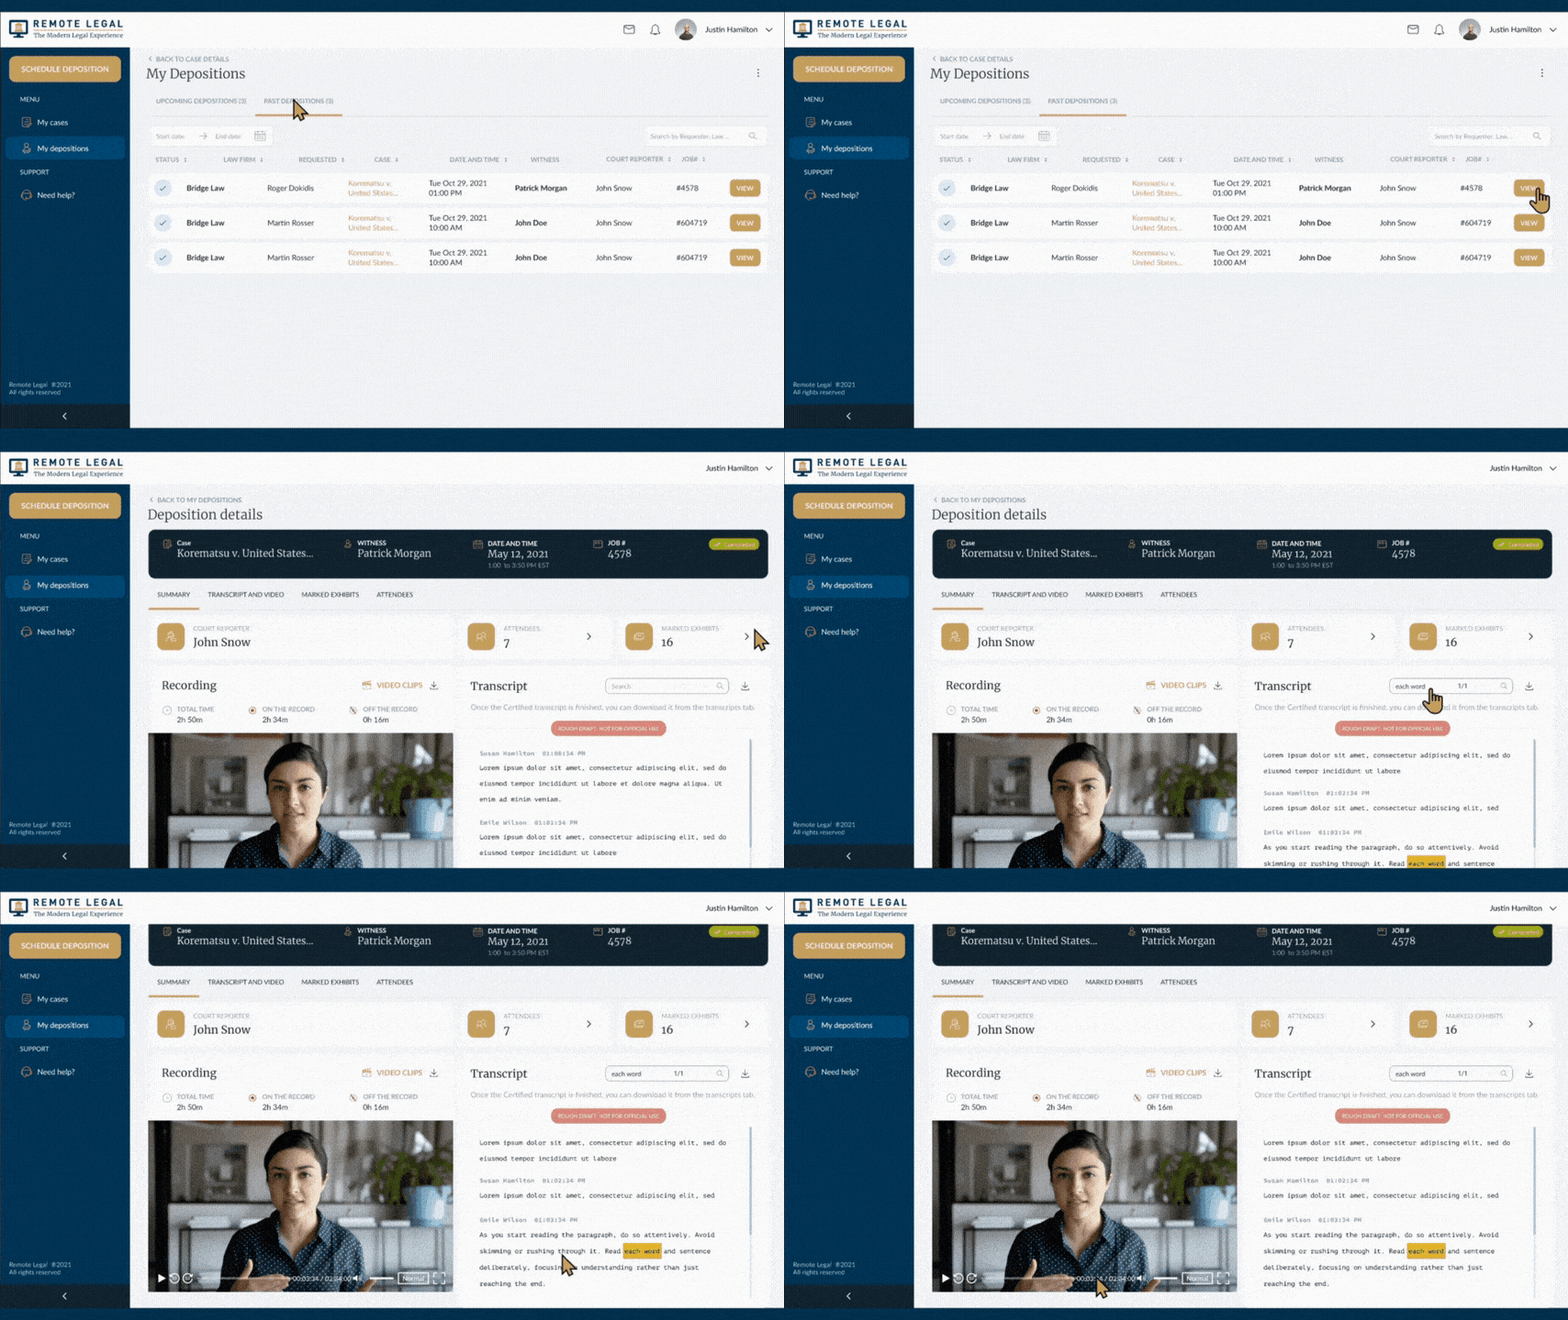
In the Post Deposition Summary tab, choose the deposition video you want to clip.
Search the speech-to-video synced transcript or review your flagged notes to find the section you want to feature. When you click on the text in the transcript, it will automatically shift to that same time and section of the accompanying video.
Look at the time within the video to know when you want your clip to start and end. You will want to match this time to what you select in the video editor pop-up next.
Step 3: Open the Video Clipping Tool
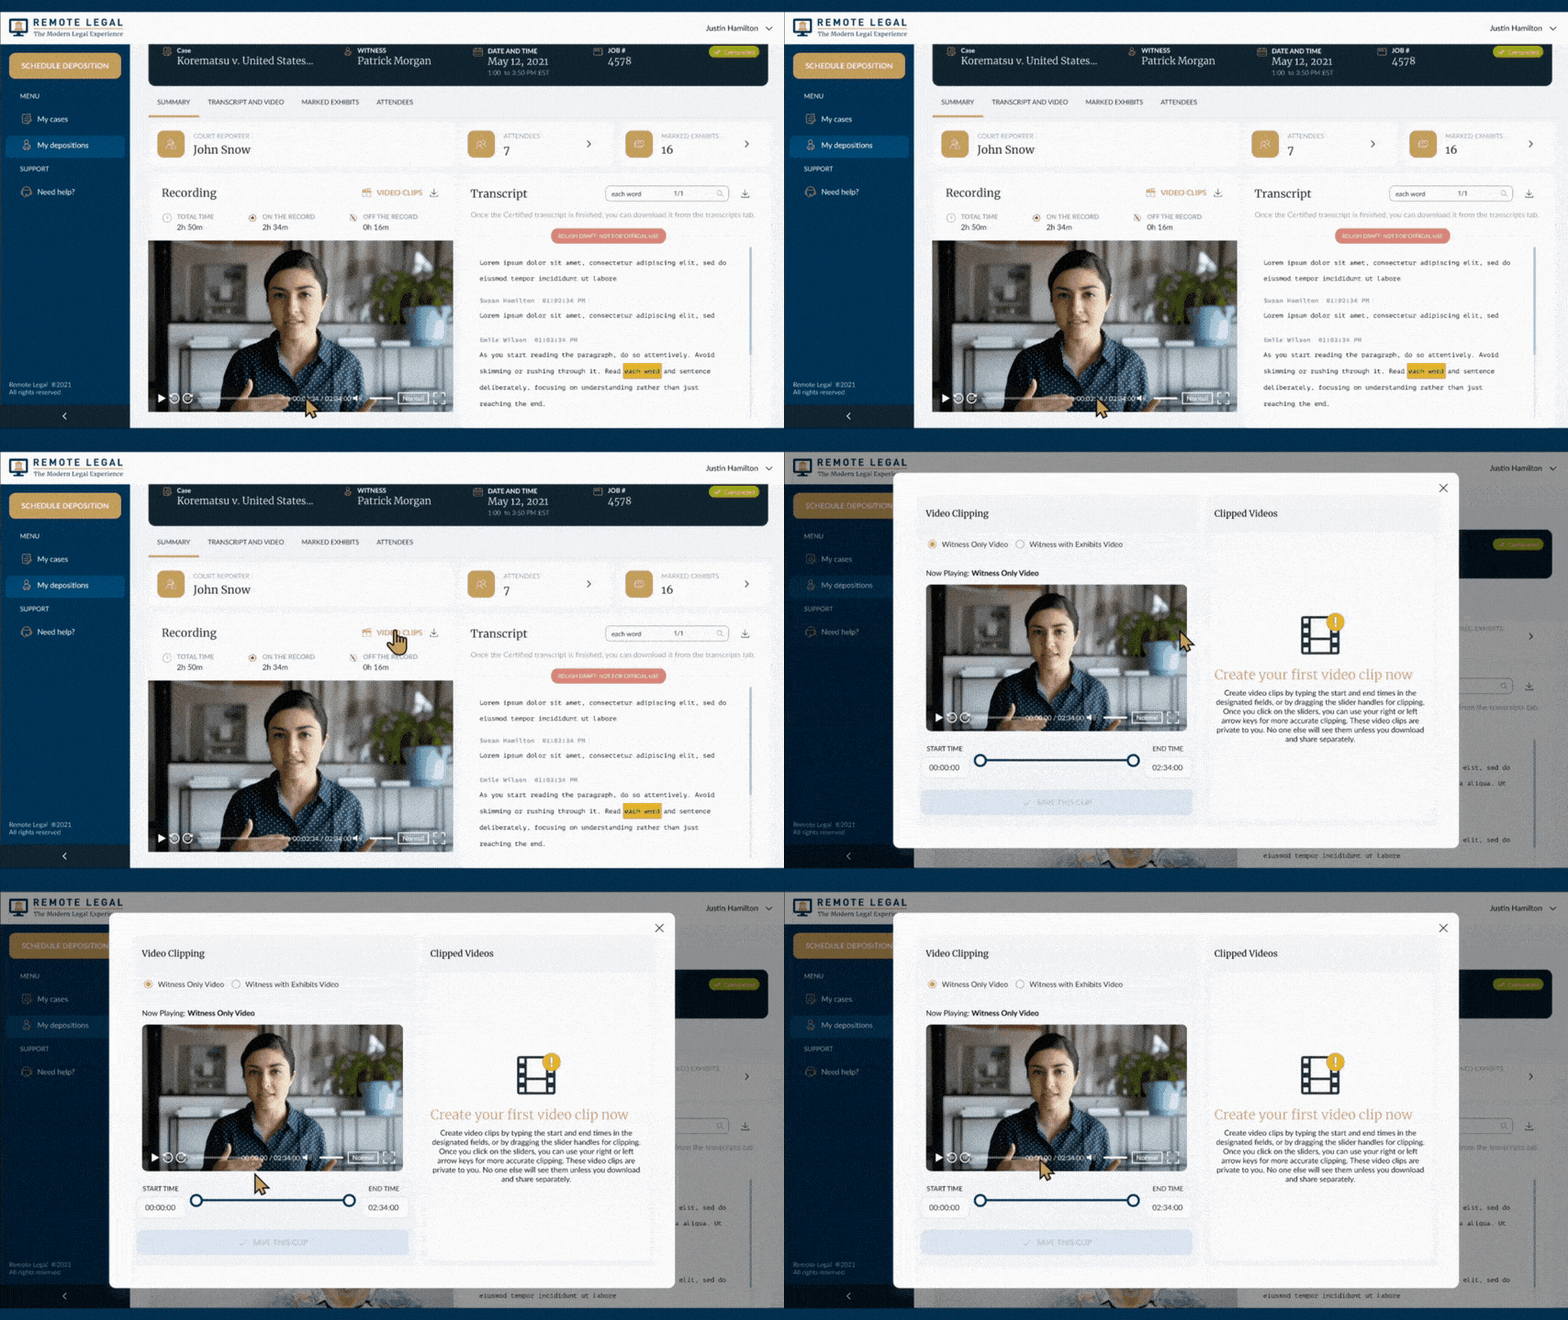
Select the VIDEO CLIPS hyperlink in the Recording section above the Witness video. This will open the video clipping editor.
Please select between the Witness-Only or Witness with Exhibits videos to clip.
Step 4: Set Start and End Points
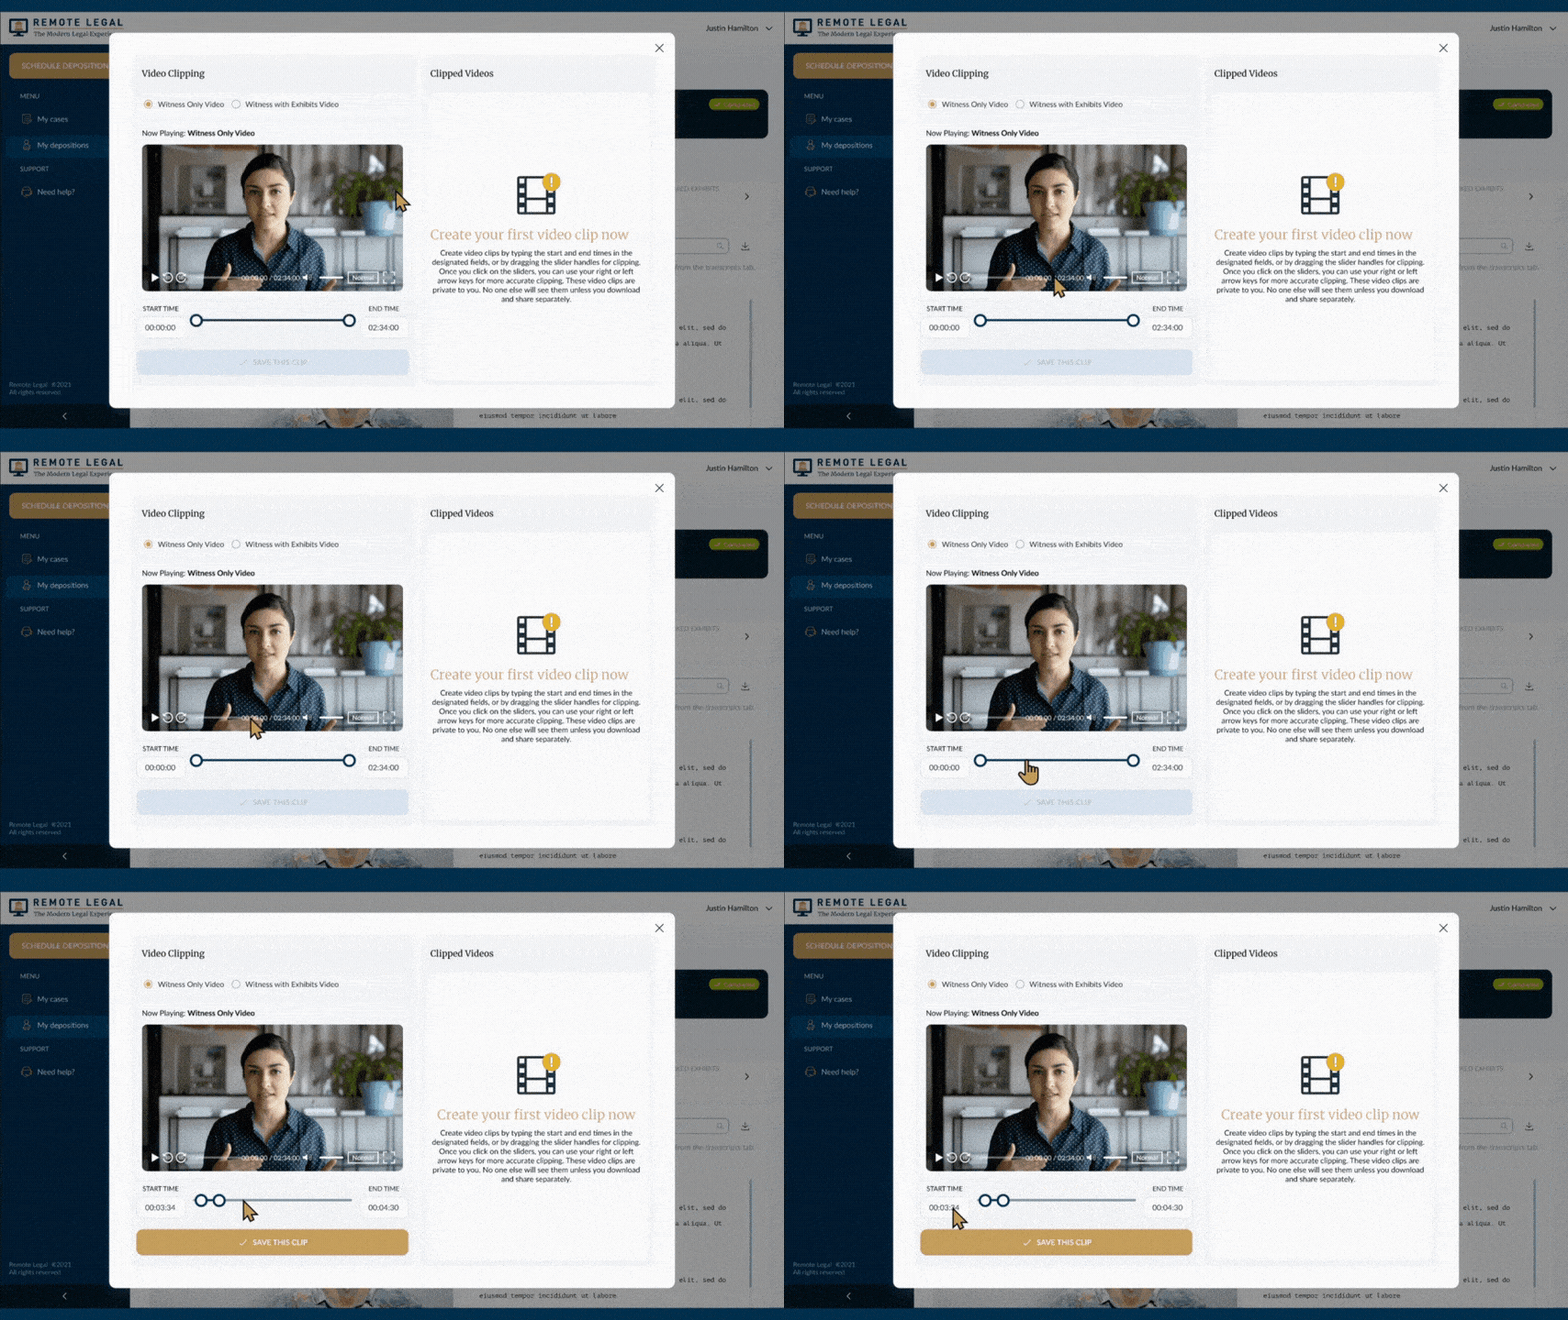
Now that you’ve opened the video editor, drag the slider bars on the video player to the START AND END POINTS you identified in the transcript. This will set the starting point and end point of the video clip you want to capture.
You can also manually type in the start/end times or click on the slider and use the forward/backward arrows to move the slider second by second.
Step 5: Create and Save the Video Clip
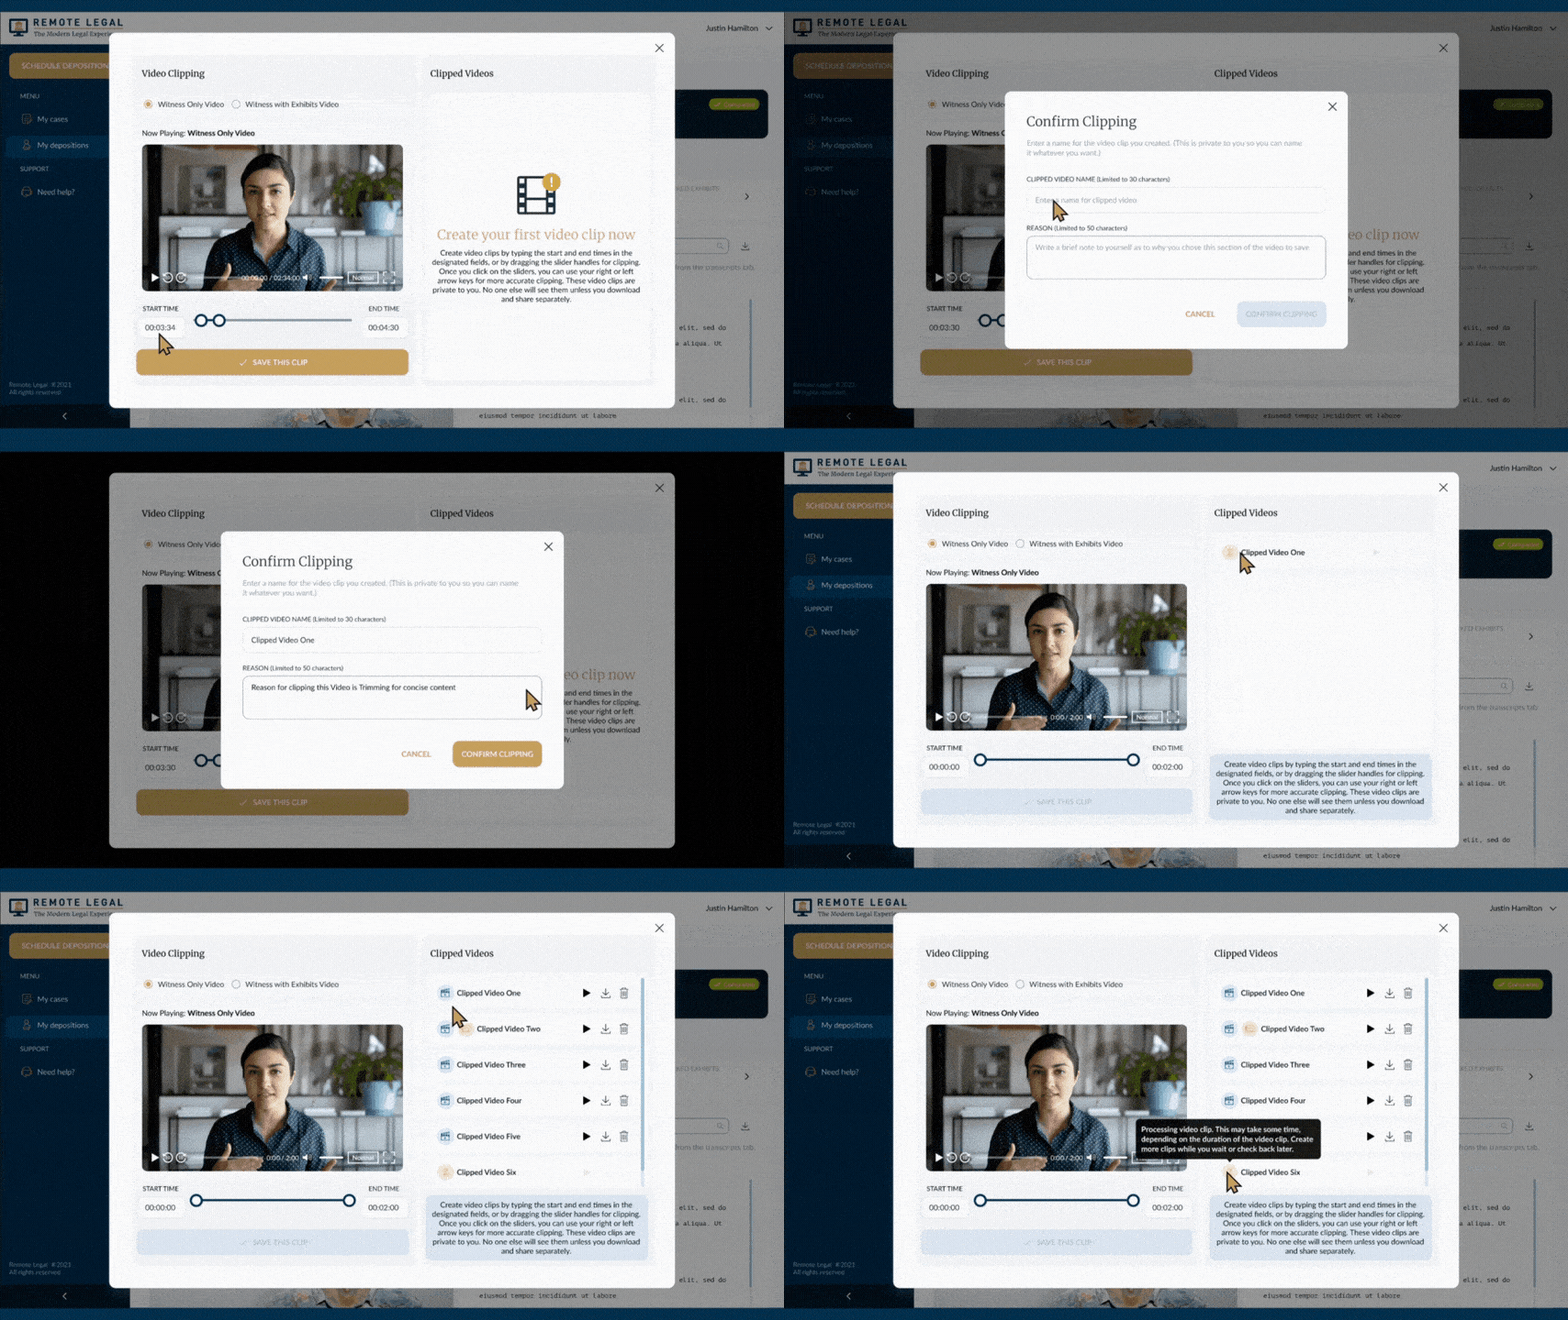
After setting your start and end times, click SAVE THIS CLIP.
- Name your clip
- Write a reason in the field below for why you highlighted this clip
After you save the video, it will be stored in this same Video Clipping pop-up editor folder for you to access anytime. Each saved video clip is private to each account.
Video Clips will appear as a yellow icon while the clip is processing and turn blue when the processing is complete. You will notice an additional icon indicating which is for the Witness with Exhibits videos.
Saved video clips can continue to be shortened and saved as a new clip under a new name, if needed.
Once complete, you may download the clip and share it externally.
Tips for Effective Video Clipping
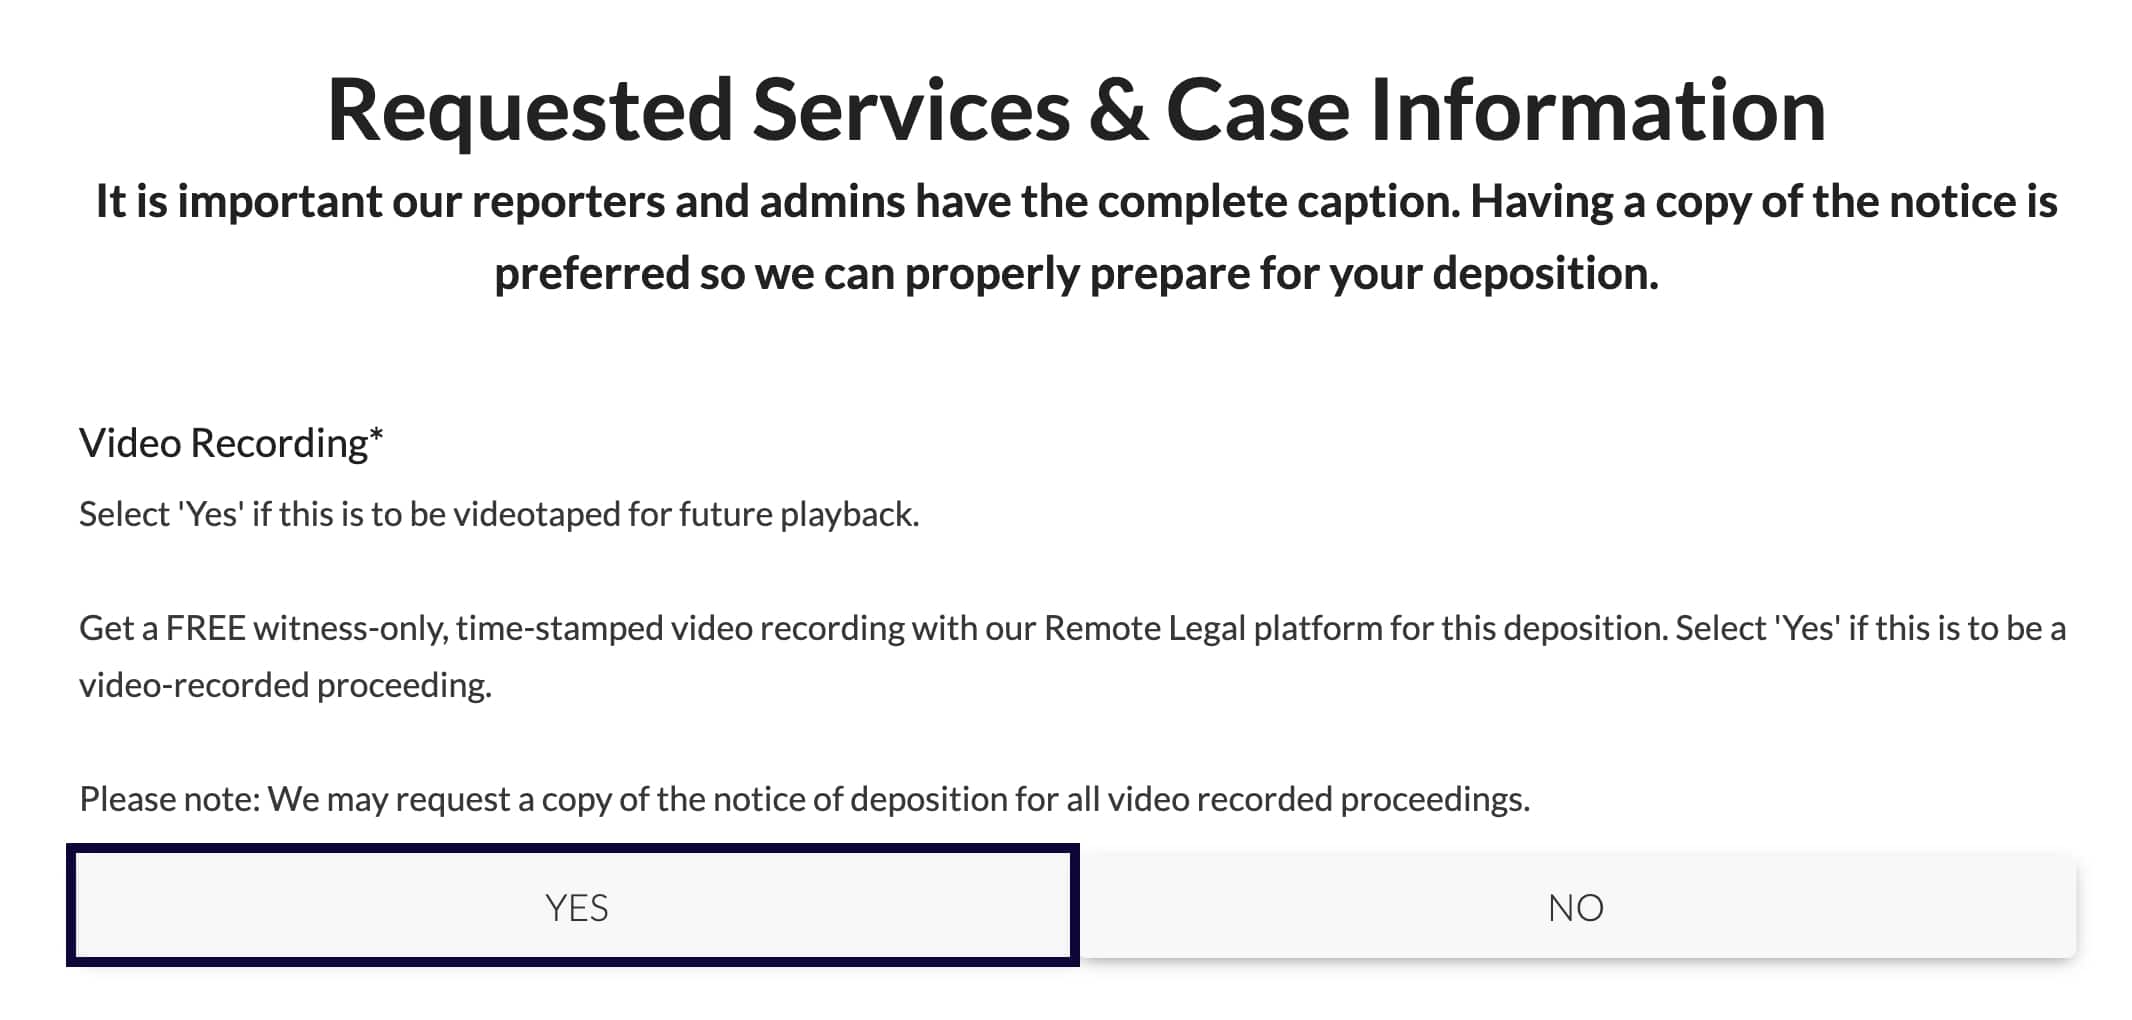
- When scheduling your next deposition, please select ‘Yes’ in the Video Recording option. This ensures your proceeding will be videotaped for future playback with the ability to make and clip videos.
- Use Flags, Personally Saved Notes, and AI Deposition Summaries to prepare ahead of time what video clips you may want to highlight
- Regularly organize your clips into folders within your library for easy retrieval during case preparation or presentations.
If you have any further questions, please reach out to your representative or client support at info@remotelegal.com or call (646) 641-3400.
See Remote Legal in Action
Let us show you our single source solution so you can get back to doing the things you love.